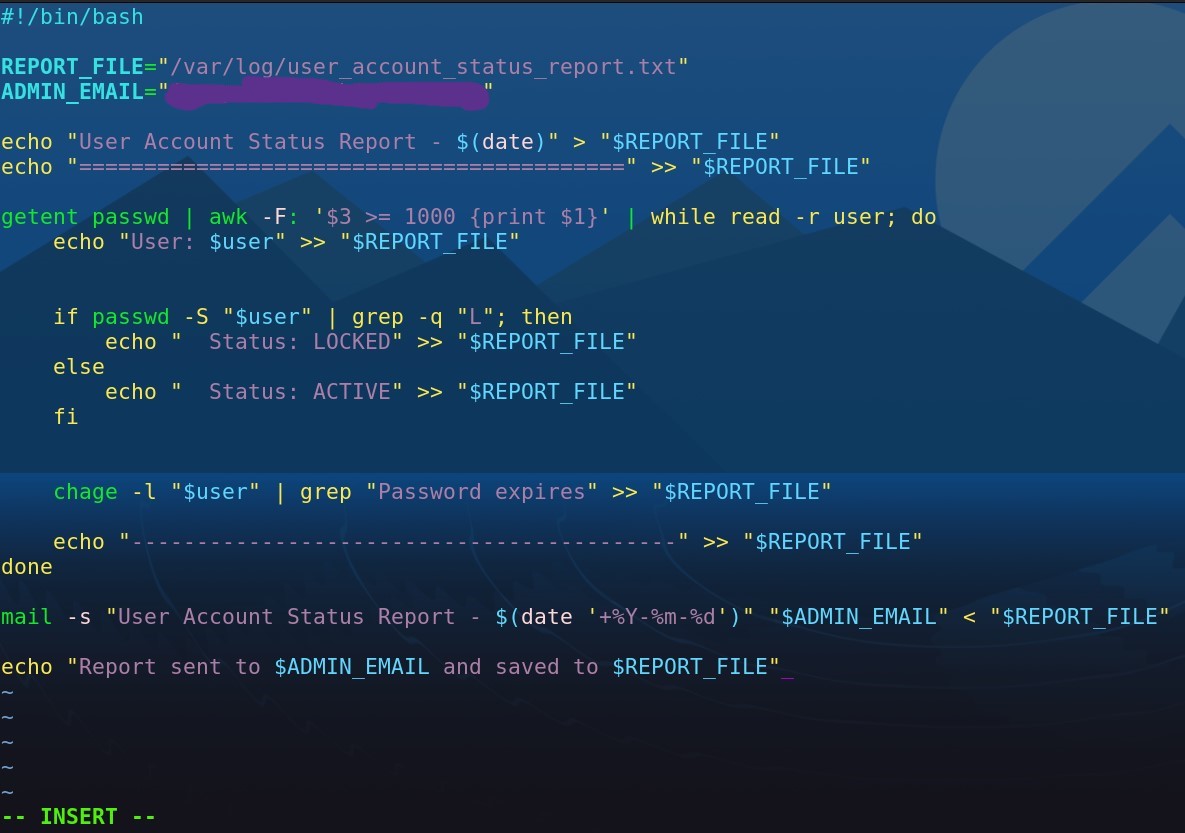
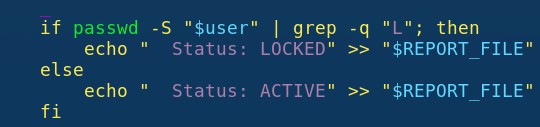
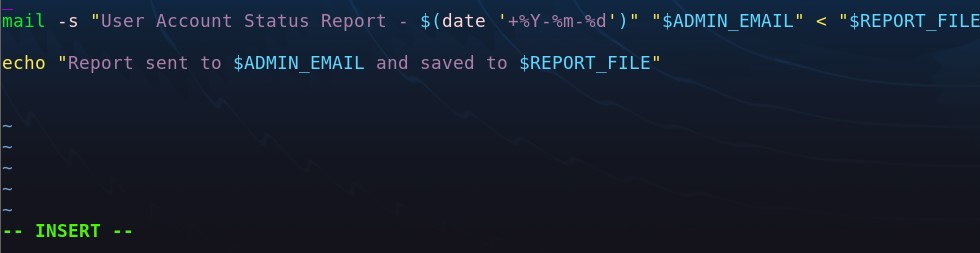
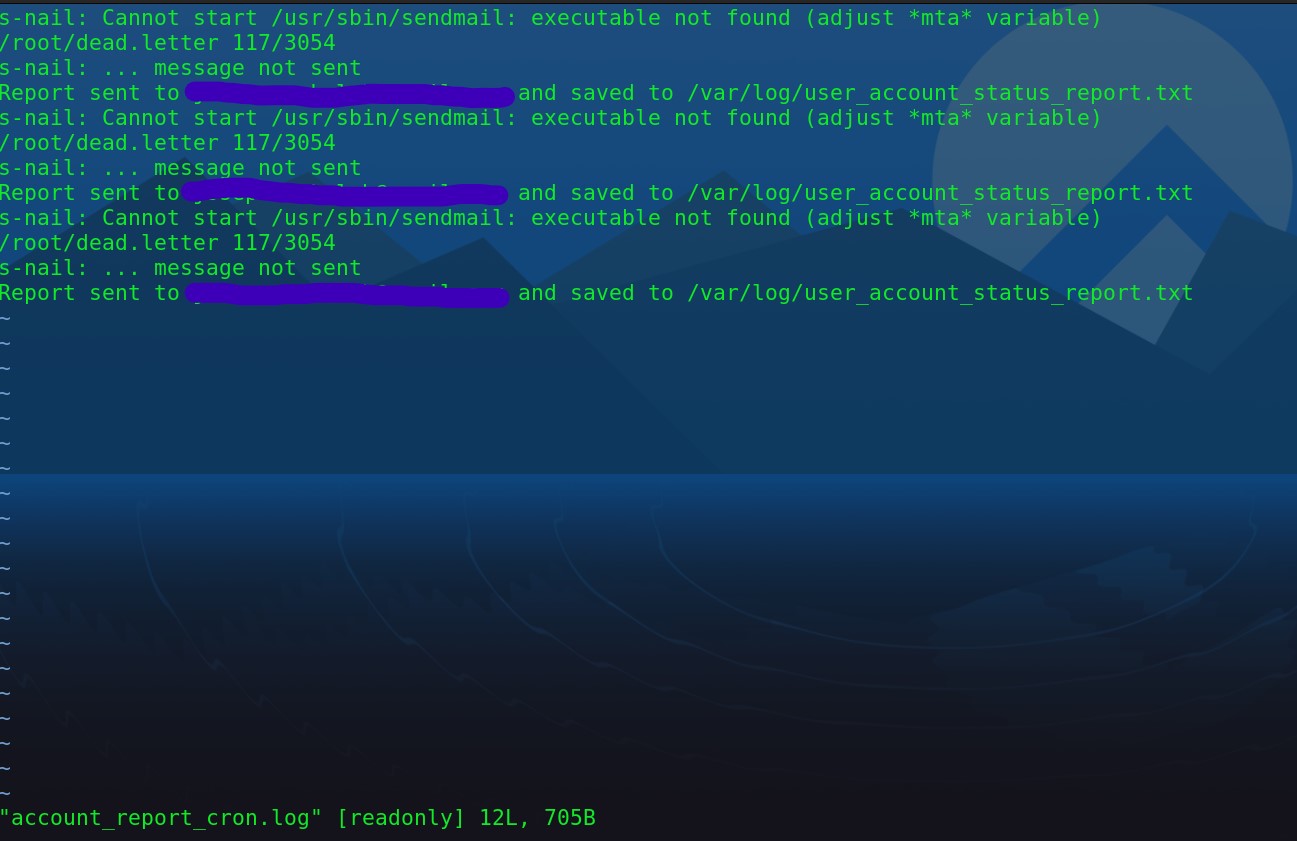
I am an IT professional with 5 years of experience, having worked in various roles including IT Technician, Service Desk Tech, IoT Help Desk Customer Service Representative, and Operations Tech. Throughout my career, I have gained extensive knowledge and hands-on experience in troubleshooting, network management, and providing top-notch customer service for a variety of technology needs. In addition to my IT expertise, I bring 17 years of military experience as a Physical Security professional, which has honed my skills in security protocols, problem-solving, and attention to detail. This combination of technical knowledge and military discipline enables me to approach every challenge with a strong work ethic and a strategic mindset.
In my free time, I enjoy studying new technology through Udemy courses, which allows me to expand my knowledge and stay updated with the latest trends. I also dedicate time to building projects, as I find hands-on experience crucial for sharpening my skills. By combining these learning methods, I can continuously improve and apply what I’ve learned, ensuring that I stay ahead in my field.
Project 1:
User Account Creation Script
Project 2:
Home NAS with my Ubuntu VM
Project 3:
Setting Up a Web and DNS Server on Ubuntu Linux
Project 4:
Running a Virtual Mail Server
Project 5:
Automating Linux Administrative Tasks with Ansible
Project 6:
Deploy and Configure a Web Application on AWS
Project: User Account Creation.
Objective: Create a Bash script that automates the process of creating accounts.
1. After deploying the script, it will prompt the user for a username,
2. Once username has been established. Type out first and last name for the comment in the script.
3. After fullname has been provided, assign the user to the appropriate group.
4. Answer if the user should be assign to the sudoer group.
5. After selecting yes or no to assign the user to the sudoer group, create a password.
6.Once password has been created. The user's account has been completed.
6.Then confirm if the user is actually created and has been assigned to the appropriate group by iding them from the terminal.
Project: Home NAS with my Ubuntu VM
Objective: Create a shared NAS filesystem using samba.
Task Requirements:
1. Install Samba
2. Then we need to create a share drive that will be used in order for my Windows PC to connect to over the network.
3. Set up permissions to nobody:nogroup. This way if something goes wrong within this drive it doesn't cause a problem with the system.
4. Provide the drive with 0777 so that I can even upload some executables.
5. Now we need to open up the smb.conf file to input some changes that will allow us to connect to a specified drive from my Ubuntu server. We do this be either VIM or nano. I'm using nano.
6. Add the path, valid users, and permission requirements within the share.
7. Once the smb config file has been updated. Restart Samba.
8. Now we go and map out the drive destination on my windows machine.
8. After inputting the drive destination. I was able to map it to my laptop and tranfer an image over to my Ubuntu server.
Project: Setting up a Network File System (NFS) and Storage Area Network (SAN) on Ubuntu Linux
Objective: Create a shared filesystem using NFS and a centralized storage system using SAN on Ubuntu Linux, to provide a scalable and fault-tolerant storage solution for a network of Linux and Windows clients.
Task Requirements:
1. Install Ubuntu Linux: Install Ubuntu Linux on a spare computer or a virtual machine. You can download the latest version of Ubuntu from the official website.
2. Configure Disk Storage: Configure disk storage on the Ubuntu Linux system, using tools like fdisk, parted, or LVM to create a disk layout that includes separate partitions for the operating system, data, and swap space.
3. Set up NFS Server: Set up an NFS server on the Ubuntu Linux system, using tools like nfs-server and nfs-client to share a directory with other clients on the network.
4. Configure NFS Exports: Configure NFS exports to control access to the shared directory, including setting up permissions, access control lists (ACLs), and export options.
5. Set up SAN Storage: Set up a SAN storage system using tools like iSCSI or Fibre Channel to provide a centralized storage solution for the network.
6. Configure iSCSI Target: Configure an iSCSI target on the Ubuntu Linux system, using tools like tgt and iscsitadm to provide access to the SAN storage.
7. Mount NFS and iSCSI Filesystems: Mount the NFS and iSCSI filesystems on client machines, using tools like mount and umount to access the shared storage